In many cultures sharing a good meal is the beginning of a friendly welcoming ceremony.
Breaking bread is a “let’s have peace and share some bread” gesture. I would like to add – please let it be…. sourdough bread.
Don’t get me wrong, making and eating bread might seem like a peaceful act, but in my kitchen there has been moments…. where it honestly looked like a war had been taking place.
I once hired a painter, who left NO spots after painting our walls all white. I know of men and women who can have gardens, farms, work shops – and not leave a spot of dirt while they are working there.
That is not me. Whether I plant tiny little herbs, paint door frames or bake bread, the traces to my activity is never (I wish…) untraceable. But I keep telling myself to ignore the process casualties and focus on the result.
Years of bread “deprivation” (in the States to begin with, and before that in Nepal) – either because I couldn’t get the right flour- or because the bread around me (in my one-eyed opinion), was so ax80ahagadq#… (That was my forehead which just landed on my keyboard, merely thinking of how boring bread can be)… zzzzzz….. Well, it just created a (close to) “bread obsession”. I simply HAD to do something about it.
Together with my husband (who is the technical wizard) we went shopping and bought a huge (heavy, I must admit) Kitchen Aid Stand Mixer. Like having a birthday on an average Monday. Oh boy. I wish I had done that, years ago. My mixer has brought new dimensions into my bread baking.
You can argue, that the contradiction in baking your own bread and the costs it involves might not be that smart after all. The key word to me here is however the quality of the daily bread. The pure joy it brings me and my family is worth every penny. I even bring homemade bread to friends instead of flowers, sometimes along with homemade marmalade, herb salt or good cheese.
Apart from all the above arguments, there is another important thing in baking your own bread. It is a process – where the outcome is not predictable, but always exciting. True, there are lots of things that can go wrong. But using the right (good quality) flour, paying attention to the temperatures the batch is exposed to and learning baking techniques, makes all the difference.
Trust me, it is not difficult to bake your own bread, but as so many other things in life, practice helps. Good luck making your own sourdough bread. You won’t regret it, once you have started.
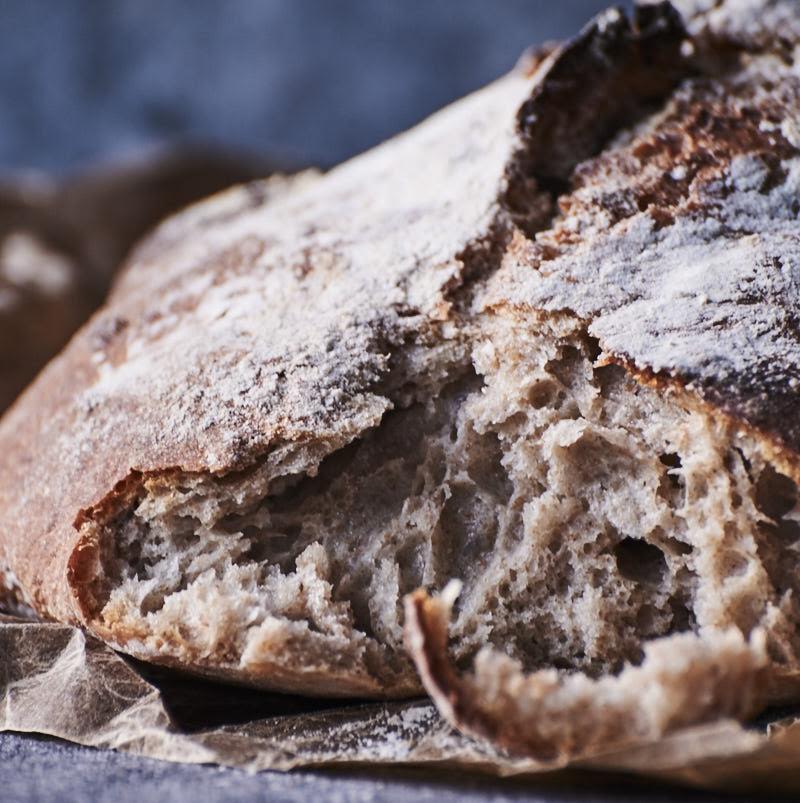
Sourdough bread – the best in town (new recipe)
1 (huge) loaf or 2 smaller ones
All though this sourdough process takes several days the first time, it is worth all your efforts, I can promise you that much. After tasting this homemade bread, you will easily get into a baking routine and never miss out on having good bread in your home.
Day 1:
Basic sourdough
100 g. cold water 50 g. rye flour 50 g. whole-wheat flour.
Instructions: Mix the ingredients in a bowl. Place the sourdough on your kitchen counter in a glass with a lid – for 3- 4 hours.
Place the glass with the sourdough in the refrigerator.
Day 2:
Refresh the sourdough, meaning – dispose 2 tablespoons of the sourdough.
Now add 100 g. cold water, 50 g. rye flour and 50 g. whole wheat flour (still in the glass container with the lid on) – leave it on the kitchen counter for 1 hour (or till you notice the bobbles).
Place it in the refrigerator again (this process can be repeated every time you bake).
If possible repeat this process once a day – a couple of times before baking.
Day 3:
Take 100 g. of the sourdough for your bread, dispose (or give to a friend) 2 tablespoons of sourdough and refresh it again (as above).
Add 7 dl of cold water to the sourdough, plus 10 g. of fresh yeast (or 1 teaspoon dried yeast), 1 handfull oats 450 g. Tipo 00 wheat flour (Italian flour – with much gluten), 100 g. rye 100g Manitoba 50 g. whole wheat, 1-tablespoon coarse kosher salt.
Instructions: Stir in the ingredients together in a mixing machine – at low speed for 10 minutes. (Add the salt in the last minute or two).
The dough is now shaped into a ball and looks a bit “shiny”.
Make a dough test: take a small piece of the dough up and stretch it out between your fingers (imagine it is has like a “chewing gum” texture now). When the dough does not have “holes”, it is ready to rest and rise. (If there are still holes in the dough, try adding more Tipo 00 flour and mix till the dough has the right texture).
Place the dough in a clean bowl under cling wrap for an hour on the kitchen table, then 10 to 12 hours in the refrigerator.
Day 4:
Time for baking! If you prefer freshly baked bread, take only half of the dough out – put in a clean bowl.
Keep it covered by the cling wrap and let the dough rise for 1 hour at the kitchen table as it “wakes up”.
Heat the oven to 250 degrees.
Flip the dough out on to the cookie sheet, place it on a baking stone/or the griddle (which is preheated in the oven). Sprinkle a little bit of cold water and 1 tbsp. flour on the bread and put it into the oven.
Turn up the heat now with hot air so that the temperature becomes as high as possible.
Bake the bread at 250 – 270 degrees for 10 minutes.
Turn down the temperature to 240 degrees – and bake the bread another 25 – 35 minutes.
Remove the bread from the oven and cool it on a rack before it is eaten with cold butter – or serve it for dinner with soup.


)
What does “refresh the sourdough” mean? 🙂
To “refresh the sourdough” means to get rid of 3/4 of your portion (after you have used a portion for your bread) and add more flour (like 2 tablespoon whole wheat, 2 tablespoon wheat flour) and water (4 tablespoons).
I love this bread!